

How to Find Hidden Electrical Wires Behind Walls Without Cutting Them Open
A Real Homeowner Case Using the RALCAM M506 Inspection Camera
When you're doing home repairs, one question causes more stress than almost anything else:
What's behind this wall or ceiling?
If you drill blindly, you might get lucky — or you might hit an electrical wire or pipe and turn a simple project into an expensive repair.
In this guide, you'll learn a safer way to locate hidden wiring using a real customer scenario and the RALCAM M506 borescope camera.
Why Hidden Wire Detection Matters Before Drilling
Whether you're a homeowner, DIYer, or contractor, most projects involve drilling into finished surfaces:
- Installing shelves or cabinets
- Adding support beams
- Running new wiring
- Mounting TVs, lights, or ceiling hardware
The problem: you can't see inside drywall or ceiling cavities.
Traditional methods (tapping, guessing stud spacing, trial holes) are unreliable. If you hit live wiring, repairs can involve:
- Electrical troubleshooting
- Drywall replacement
- Paint and finishing work
- Potential safety risk
That's why non-destructive inspection is becoming a best practice.
Real Customer Story: Solved in Under 30 Minutes
A homeowner named Mark (20+ years of DIY experience) needed to install a structural beam below a finished basement ceiling. He already knew a cable ran somewhere above the ceiling, but didn't know the exact wire path or whether it crossed his planned beam location.
Instead of opening a large section of ceiling, he used a RALCAM M506.
Step 1: Drill a Small Access Hole
The M506 probe diameter is 6.2 mm, so he only drilled a pencil-sized hole near the target area. Later patching required only minimal filler.
Step 2: Insert the Camera and Inspect in Real Time
Using the M506's 5-inch HD screen, he could clearly see wood framing, insulation, and the electrical cable route. With joystick-controlled articulation, he adjusted the viewing angle inside the cavity without repeatedly removing the probe.
Step 3: Shift the Plan, Avoid Damage
He confirmed the cable crossed the original beam position, then moved the install point and avoided the wire completely.
Total inspection + decision time: less than 30 minutes.
No major ceiling demolition. No emergency electrician call.
How to Check for Wires Behind Walls (Step-by-Step)
- Mark your planned drilling or mounting area
- Create a small access point in a low-visibility spot
- Insert the inspection camera probe
- Scan for cable paths, pipes, studs, and obstacles
- Capture photos/video for reference
- Adjust your drilling or mounting location before proceeding
Pro tip: Always turn off power to relevant circuits before working near suspected electrical lines.
Why the RALCAM M506 Is Effective for Wall/Ceiling Inspection
Here's what makes it practical for hidden-space diagnostics:
- 6.2 mm slim probe for tight cavities
- Live HD display for immediate visual confirmation
- Articulating camera control for multi-angle viewing
- Adjustable LED lighting for dark interior spaces
- Photo/video recording (32GB) for documentation
- Portable modular design for home and field use
Common Use Cases Beyond Hidden Wire Detection
Users also rely on borescope tools like the M506 for:
- Pipe and plumbing checks
- HVAC drain pan and coil inspection
- Duct interior diagnostics
- Exhaust and mechanical cavity checks
- Pest entry point tracing in wall gaps
- Lock and small mechanism troubleshooting
Best Practices for Better Inspection Results
- Hold probe position steady before adjusting camera angle
- Lower LED brightness in reflective areas to reduce glare
- Record findings so future repairs require less rework
- Plan entry points strategically for easier patching afterward
FAQ: Finding Wires Behind Walls
Can a borescope detect live electrical current?
A standard borescope is a visual tool — it shows wire location, not voltage. Use a voltage tester separately if needed.
How big of a hole do I need?
With a slim probe like 6.2 mm, a small access hole is usually enough.
Is this useful for finished ceilings?
Yes. It's especially useful in finished spaces where you want to avoid large cutouts.
Can I use this method without professional help?
For basic visual inspection, yes. For rewiring or safety-critical electrical work, consult a licensed electrician.
Final Thoughts: See First, Drill Second
Blind drilling is risky, especially in finished spaces. A quick borescope inspection helps you locate hidden wires and avoid costly mistakes before damage happens.
If your project depends on what's inside the wall, the smarter workflow is simple: Inspect first. Drill second.
Find the right inspection camera for your job
From DIY home use to professional-grade inspection, explore our full range of borescopes and endoscopes.
Browse all products →Need a reliable industrial inspection tool?
Browse our industrial borescopes and videoscopes — built for NDT, pipeline, and machinery inspection in demanding environments.
Shop industrial borescopes →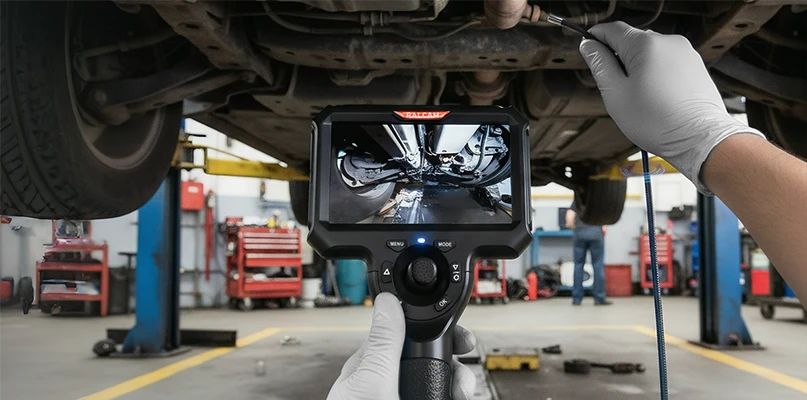
Leave a comment